QuicklySign UI to set up a document from your application
When users upload documents into your system and they need fields placed, you can use the embedded setup page or the standalone setup page. The page will render the document where the user can add fields, add additional documents and request signatures.
Once the document is in progress (awaiting signatures), the same viewing link can be used to view the status of the document.
How it works
Step 1: Create a document via the API (upload it as a base64 encoded string via the document pack endpoint). In the query string, append generate_view_url=true&host_url=<the quickly sign site you'll be using>
Step 2: In the body of the return response, there is a property "viewing_link". Use that link in your application.
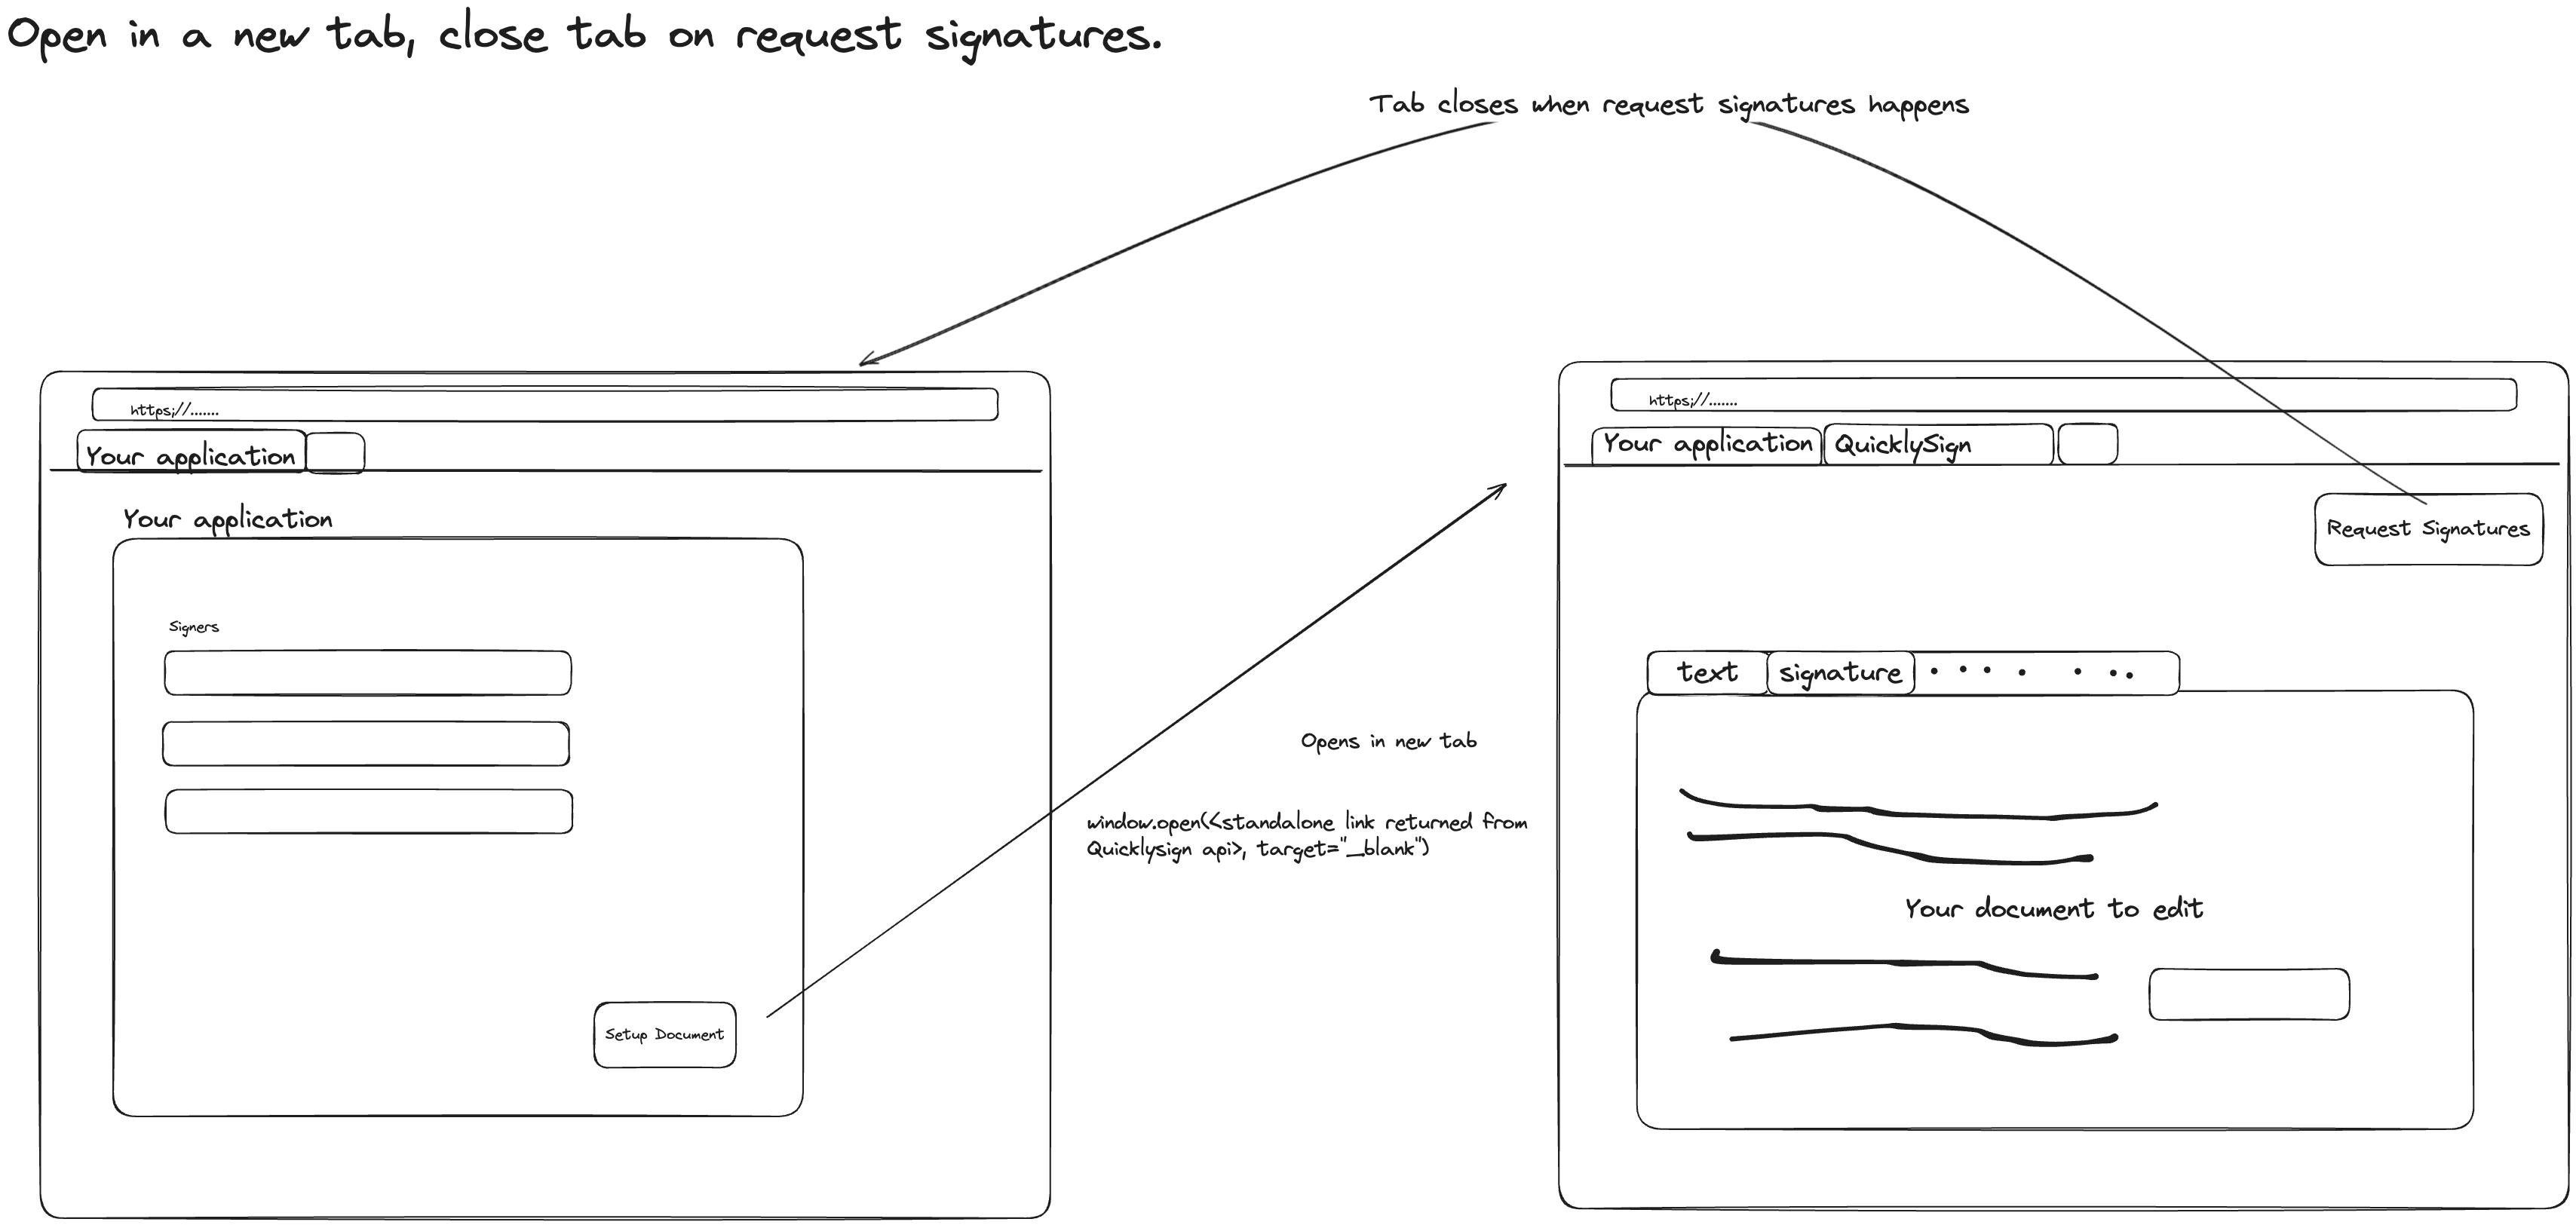
Step 3: Using the viewing link from your web page, append it to <quicklysign site>/standalone_v1?url=<viewing_link> use javascript to open in a new window as follows: window.open(<standalone_link>). NB. Without this step we won't be able to close the tab once signing request is sent.
You can add properties to the query string to indicate what elements in the QuicklySign UI to display.
-
show_action_button: Set this to
trueif you want the 'Request signatures' or 'Revert to setup' button to be visible. The default isfalse. -
name_visible: Determines whether the document name is visible or not. The default is
false. -
signatory_details_visible: Determines whether signatory details should be visible on the standalone page. The default is
false. -
settings_visible: Determines whether the document settings should be visible or not. The default is
false. -
user_defined_attributes_visible: Determines whether user-defined attributes should be visible or not. The default is
false. -
tabs_visible: Determines whether document tabs should be visible. Document tabs contain the names of the documents in the pack. The default is
false. -
upload_new_document_enabled: If the document is in setup, specifies whether the button to upload a new document should be shown. The default is
false.
Note: If you want the standalone page to close automatically after the signature request has been sent or signing is completed, use the JavaScript window.open() function.
This is necessary because the Quicklysign app uses window.close(), which can only be called on windows that were opened by a script using the window.open() method.
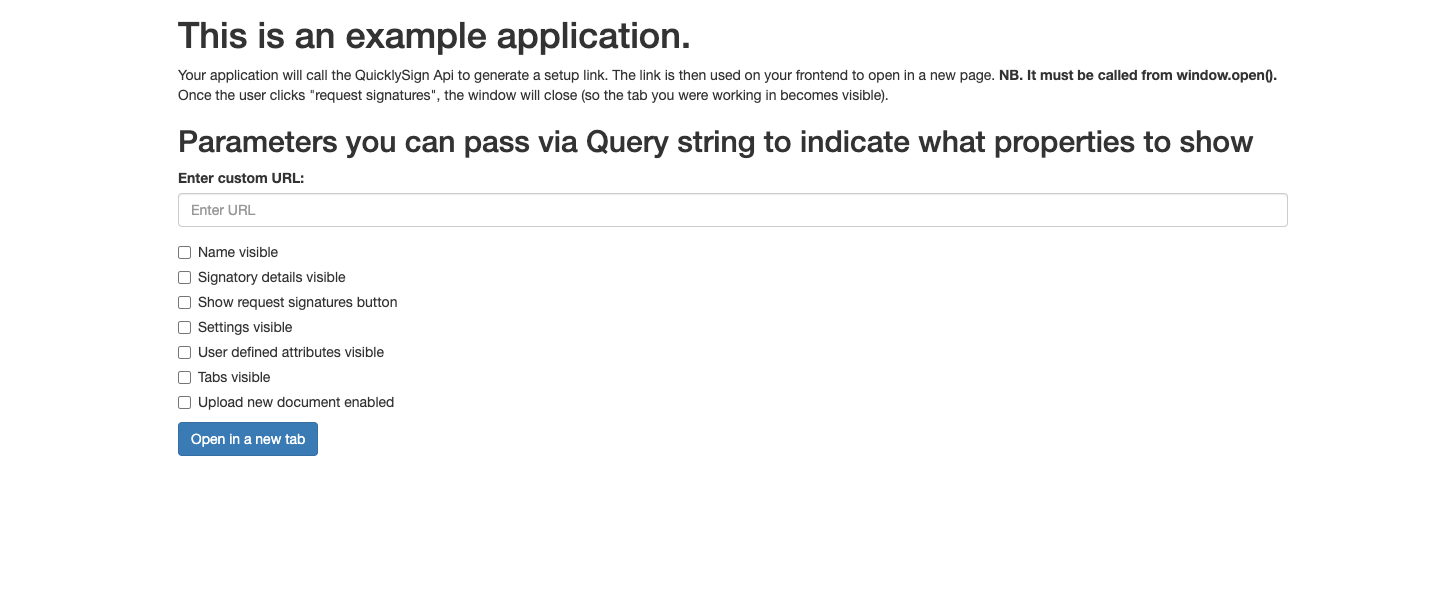
Test page to assist with understanding the functionality.
Create a viewing link as specified in step 1 above.
Then navigate to https://financial.quicklysign.com/demo/standalone_setup_page to try out the feature.
Paste the link in the box provided and use the page to open new tabs etc. Here's the example page below.